
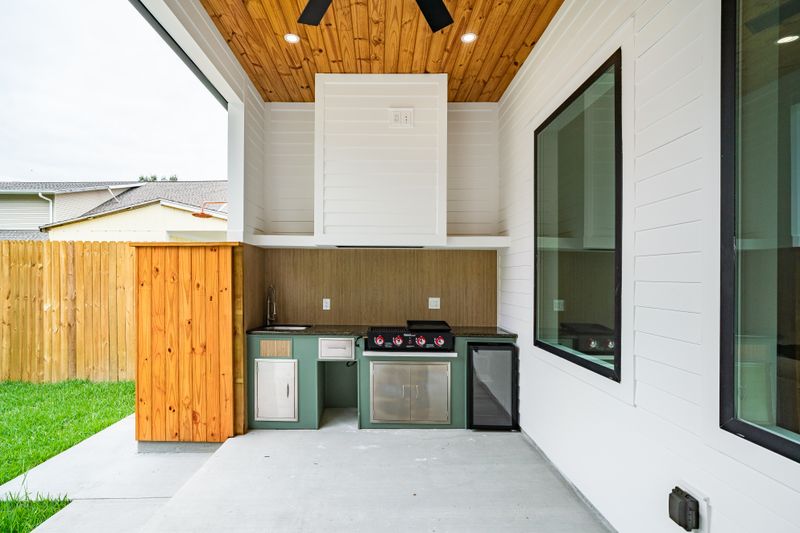
Key Takeaways
- Setting a realistic budget early prevents mid-project surprises, since costs can swing dramatically based on size, materials, and appliance choices
- A typical build takes four to six weeks from design to final inspection, so plan your timeline around weather windows and permit lead times
- Choosing a modular or prefabricated frame instead of fully custom masonry can cut construction costs by thousands without sacrificing durability
- Prioritizing a solid grill, prep counter, and storage first lets you add luxury features like pizza ovens or kegerators in future phases
- Running utilities such as gas, water, and electricity accounts for a large portion of hidden expenses and often requires licensed professionals
- Shopping end-of-season sales for appliances and reclaimed materials for countertops and cladding can shave 20 to 40 percent off retail pricing
- Permits, inspections, and local code compliance should be handled before any concrete is poured to avoid costly rework
How to Build an Outdoor Kitchen on a Budget: Your Step-by-Step Timeline
Backyard cooking has shifted from a weekend hobby to a full lifestyle investment, and homeowners across the country are discovering that a well-planned alfresco cooking area can rival the heart of any indoor home. Where a simple charcoal grill on the patio once satisfied the summer entertaining itch, families now want prep counters, cold storage, task lighting, and seating that can host a dozen friends on a Saturday night. The problem? Price tags often climb into territory that feels more like a kitchen remodel than a patio upgrade, with contractors quoting figures that would cover a new car or a down payment on a vacation home. The good news is that strategic planning, phased construction, and smart sourcing can bring the dream within reach for far less than the glossy magazine spreads suggest, and the best outdoor kitchens are often not the most expensive ones but the ones built thoughtfully over time.
Research from Angi shows that installation costs range from $6,304 to $27,087, with an average of $16,587. That spread is enormous, and it tells you something important: your final bill depends almost entirely on the choices you make during planning. Every decision, from the slab beneath your grill to the knobs on your doors, either adds or subtracts hundreds of dollars. Choosing concrete pavers instead of natural flagstone can shave a thousand dollars off your foundation. Picking a quality mid-range gas grill rather than a built-in commercial unit can save three or four thousand more. Even the finish on your cabinet fronts, the brand of your side burner, and whether you run a dedicated gas line or use a refillable propane tank all stack up quickly, nudging you toward either end of that wide price range.
This guide walks through a realistic, week-by-week approach to how to build an outdoor kitchen on a budget that balances ambition with financial reality. You will learn where to splurge, where to save, and how to sequence the work so each phase builds logically on the last. Rather than trying to tackle everything in one expensive weekend blitz, this timeline breaks the project into manageable stages, letting you spread costs across paychecks, hunt for seasonal sales, and adjust your plan as you go. By the end, you will have a clear roadmap for creating one of those outdoor kitchens that neighbors ask about for years, without the financial hangover that usually follows.
Why Setting a Clear Budget Beats Winging It
Most backyard projects go over budget because owners start buying materials before they finalize a scope. A written budget forces you to confront trade-offs early, when changes cost nothing. Begin by listing every component you want, then assign a maximum dollar figure to each.
Pricing per square foot gives you a quick sanity check. HomeAdvisor reports that most builds cover 100 to 400 square feet and run between $33 and $130 per square foot. Multiply your planned footprint by both ends of that range, and you have a floor and ceiling for your spending.
A healthy budget breakdown might look like this:
- Foundation and site prep: 10 to 15 percent
- Framing and structural materials: 20 to 25 percent
- Appliances (grill, side burner, refrigerator): 25 to 35 percent
- Countertops and cladding: 15 to 20 percent
- Utilities and labor: 15 to 20 percent
- Contingency buffer: 10 percent
Keep that contingency line sacred. Something will go wrong, whether it is a hidden tree root, a code change, or a backordered appliance.
Weeks 1 and 2: Design, Permits, and Site Planning
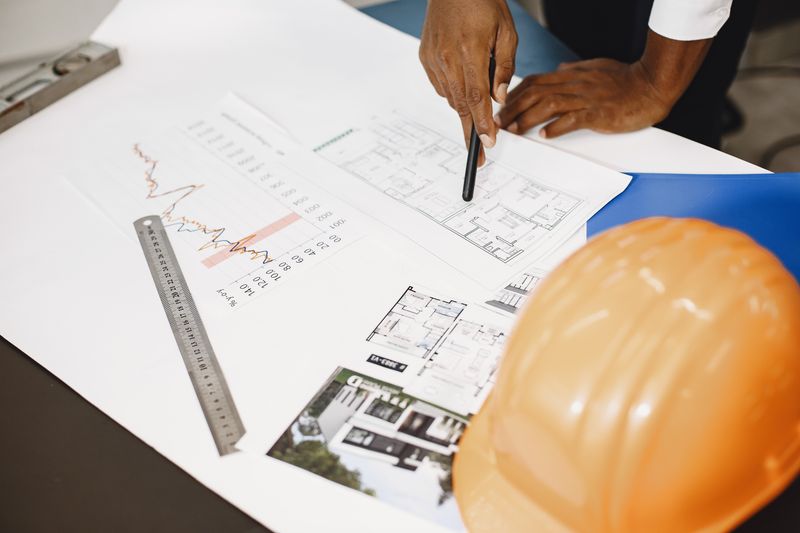
The first two weeks involve zero construction and everything that makes construction possible. Sketch your layout on paper or free design software, paying close attention to the classic work triangle between cooking, prep, and storage zones. Think about prevailing wind direction so smoke blows away from seating, and keep the grill at least ten feet from siding or overhangs.
Permits are where DIYers often stumble. Most municipalities require permits for gas lines, electrical runs, and permanent structures attached to a dwelling. Call your local building department before finalizing designs, because setback rules and height restrictions vary wildly by county.
Mapping Utilities Before You Dig
Before any shovel touches dirt, call 811 to have underground lines marked. Hitting a gas or fiber line turns a cheap project into an emergency. If your layout requires running a new gas line more than 25 feet from the house, factor in extra trenching costs. Electrical work for outlets, lighting, and refrigeration almost always demands a licensed electrician, and that labor should be budgeted at $75 to $150 per hour depending on your region.
Weeks 3 and 4: Foundation and Framing on a Shoestring
With permits in hand, construction begins. A concrete slab remains the gold standard foundation, but existing patios in good condition can often support a modular frame directly, saving the cost of pouring new concrete. If you need a fresh slab, four inches of reinforced concrete over compacted gravel handles the load of masonry builds.
Framing is where the biggest savings live. Fully custom masonry construction looks stunning but drives costs skyward. Lawn Love notes that building from scratch averages around $495 per linear foot, which adds up quickly on even a modest ten-foot run. Steel stud framing with cement board sheathing cuts that number significantly while still accepting stone veneer, stucco, or tile finishes.
Budget-friendly framing options include:
- Prefabricated steel modular kits ready for cladding
- Concrete masonry units (CMU blocks) finished with stucco
- Metal stud framing with HardieBacker cement board
- Reclaimed brick for a rustic aesthetic
- Prefab islands that simply roll into place
Each option has trade-offs between labor intensity, material cost, and finished appearance. Steel modular systems install the fastest, often in a single weekend, while CMU block offers the longest lifespan.
Smart Shopping: How to Build an Outdoor Kitchen on a Budget Without Cutting Corners
This is the heart of the matter. Learning how to build an outdoor kitchen on a budget comes down to timing your purchases and knowing which categories reward patience. Appliances follow predictable discount cycles, with the deepest cuts arriving in late September through October as retailers clear summer inventory for fall merchandise. Waiting a single season can save 30 percent on a built-in grill.
Countertops offer another savings frontier. Granite remnants from stone yards cost a fraction of full slabs and work perfectly for the typical six-to-eight-foot counter run of most outdoor kitchens. Concrete countertops poured in place require sweat equity but material costs often fall under $15 per square foot. Porcelain pavers rated for outdoor use mimic high-end stone at builder-grade prices.
Where you should not cut corners:
- The grill itself, since cheap burners rust within two seasons
- Gas line fittings and shutoff valves rated for outdoor use
- Weatherproof electrical boxes and GFCI outlets
- Mortar and grout rated for freeze-thaw cycles
- Stainless steel hardware on any doors or drawers
Spending an extra $200 on marine-grade stainless hinges prevents a $2,000 cabinet replacement five years down the road.
Weeks 5 and 6: Appliances, Finishes, and Final Hookups

The back half of the timeline moves fast once the structural work is done. According to Georgia Outdoor Living, the full installation process typically takes four to six weeks depending on complexity and material selection. Appliance installation, countertop templating, and final utility hookups all happen in this window, and coordination between trades becomes critical.
Countertop fabricators usually need five to ten business days between templating and installation, so schedule that measurement appointment the moment your base cabinets are set. Scheduling the plumber and electrician for final connections on the same day as the gas inspector can shave an entire week off the back end if you plan it right.
Sequencing the Finish Work
Order matters more than most first-time builders realize. Cladding goes on before countertops, countertops before appliances, and appliances before the final gas pressure test. Skipping ahead creates rework. A typical finish-week sequence looks like this:
- Day 1 and 2: Install stone veneer, stucco, or tile cladding
- Day 3: Template countertops
- Day 4 through 8: Fabrication offsite
- Day 9: Set countertops and seal
- Day 10: Drop in grill, side burner, and refrigeration
- Day 11: Final gas and electrical connections
- Day 12: Inspection and punch list
Build in a two- or three-day buffer for weather delays. Rain on cladding day pushes everything downstream.
Phasing Future Upgrades to Protect Cash Flow
One of the smartest moves a budget-conscious builder can make is treating the initial build as phase one of a longer plan. Rough in extra gas stubs and electrical conduit now, even if you cannot afford the pizza oven or kegerator yet. Running conduit during the open-trench phase costs almost nothing. Adding it later means jackhammering concrete.
Think about how your space will grow into connected cooking zones that link your indoor range with the backyard grill station. A thoughtful phase one leaves room for a smoker cabinet, a beverage center, or a wood-fired oven to slot in during year two or three without demolition.
Common phase two additions and their typical ranges:
- Pizza oven: $1,500 to $5,000 installed
- Kegerator or beverage center: $1,200 to $3,500
- Pergola or louvered roof: $3,000 to $12,000
- Side burner or power burner: $400 to $1,500
- Ice maker: $1,800 to $3,000
Spacing these out across tax refunds, bonuses, or seasonal sales keeps the project moving without draining savings.
Avoiding the Hidden Costs That Blow Budgets
Even careful planners get caught by expenses that never make it onto Pinterest boards. Drainage is the biggest culprit. Water pooling around a slab destroys mortar joints and rusts appliance housings. A proper French drain or slight slab pitch adds a few hundred dollars during construction and prevents thousands in repairs.
Delivery fees also sneak up fast. Natural stone, concrete, and large appliances often carry freight charges of $150 to $400 each. Consolidating orders through a single supplier when possible, or renting a trailer for a single pickup day, keeps those nickel-and-dime fees from totaling a four-figure surprise.
Other commonly overlooked line items:
- Dumpster rental for demolition debris: $400 to $700
- Equipment rental for a plate compactor or mixer: $100 to $250 per day
- Dust and silica masks, knee pads, and basic PPE
- Covers and protective tarps for finished surfaces during ongoing work
- Final cleaning and sealant reapplication after inspection
Building a line item for each of these into your original spreadsheet keeps the contingency fund intact for true emergencies.
Conclusion
A backyard cooking space does not need to cost as much as a car to feel luxurious and perform beautifully. The homeowners who end up happiest with their builds are rarely the ones who spent the most. They are the ones who planned carefully, sequenced the work in a logical order, and resisted the urge to buy everything at once.
Stick to the six-week framework, respect the budget breakdown, and lean on seasonal sales and remnant materials where quality allows. Treat utilities and structural work as non-negotiable investments, and let the showpiece upgrades arrive in later phases as finances permit. The grill you fire up this summer can anchor a space that keeps growing more impressive each year.
Most importantly, enjoy the process. Every weekend spent mixing mortar or hanging doors is a story you will tell every time friends gather around the counter you built with your own hands. That is a return on investment no spreadsheet can measure.